Sailor's Beacon
NOTE 1: Please read through the Basic Stipple Brush Technique instructions prior to reading the lesson.
NOTE 2: All inks used for stippling, painting and stamping are dye inks unless otherwise noted. Brand is not as important as color, so brand names have been left out.
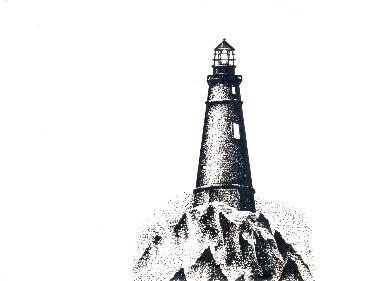
Lights, Rocks & Waves 220G stamped in black.
Mask lighthouse and rocks below it. Island Mountain Large 095G stamped in black to the left of lighthouse. This begins to define the landmass.
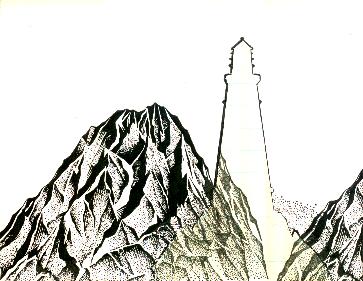
Mask mountains. Island Mountain Large 095G is stamped in gray above the first mountain. Because the first mountain is stamped in black, it appears to be a rock in the foreground with the lighthouse, rather than an actual mountain. Because the second mountain is stamped in gray, it appears to be farther away and more like a rock formation in the distance and less like rocks in the foreground.
Mask the second mountain. Island Mountain 099E is stamped with gray on scrap paper, then on the card stock above second mountain without re-inking the stamp. This will make the third mountain stamped look farther away than either the first or second mountain.
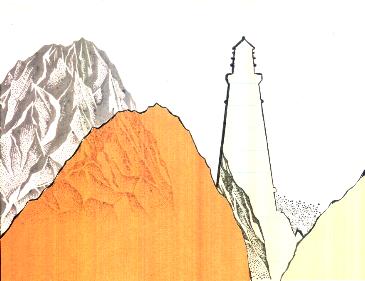
Estimate the path of the beacon of light that will radiate from the lighthouse. Pull down the top of the mask on the lighthouse to expose the upper portion of the lighthouse. Stipple yellow along the estimate path of the beacon of light, making sure to stipple over the top portion of the lighthouse itself. Replace lighthouse mask.
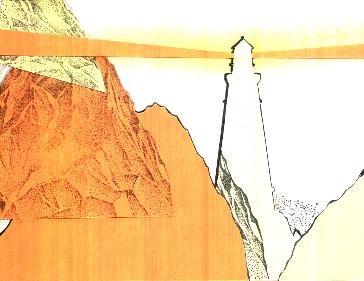
Mask the third mountain. Create a mask that resembles the beacon of light. It will be smaller at the point or origin (the lighthouse) and larger as it radiates out from the point of origin. (it will resemble a long, skinny rectangle of sorts and you will need one for each side of the lighthouse) Place the masks along the light beacon path with the smallest point at the lighthouse. Do this to both sides of the lighthouse. The light beacon mask will be smaller than the area you stippled yellow. The mask will keep the light beacon itself bright, but allow for diffusion of light outwards creating a sense of depth. Do not remove masks.
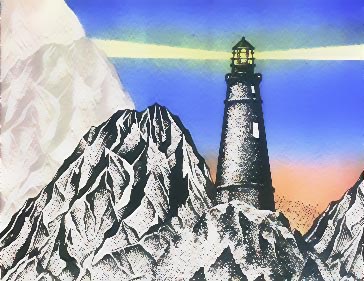
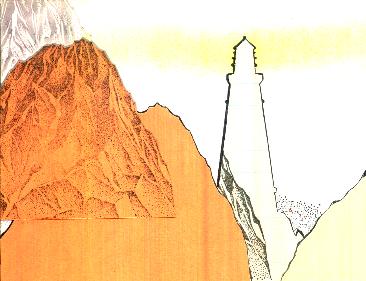
To define the horizon and give a visual cue for the time of day (sunset), stipple peach and orange along the horizon at the lower right between the lighthouse and the rocks to the right of the lighthouse. Begin stippling blue in the sky area, starting with light blue first. Slightly overlap the blues into the sunset, being sure to stipple over the yellow which remained outside of the light beacon mask. This will help to soften the edges of the light beacon and give the illusion of subdued illumination along the horizontal plane of the light beacon. Stipple medium blue over the sky area next, followed by dark blue. Remove all masks.
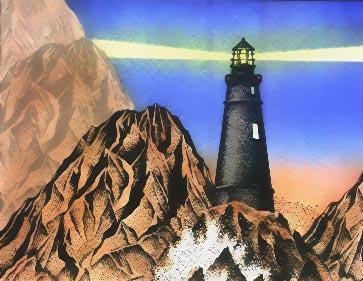
Stipple light brown over the top two mountains then stipple gray over the light brown to smooth it out. Lightly stipple medium brown over the second mountain from the top and then stipple medium brown over the mountain closest to the lighthouse that is stamped in black. Your "trio" of mountains should now be lightest at the top, slightly darker in the middle, and darker still a the bottom. This creates depth. Note that brown is NOT stippled over the area of the water spray on the rocks beneath the lighthouse.
Using a small brush, add texture to the rocks closest to the lighthouse that are stamped in black by brushing medium brown over the shaded areas within the rock formation. Brush yellow over the windows of the lighthouse.
To create the water spray, use a small stipple brush and white gouache. (white acrylic paint could also be used) Squeeze out a small amount of the gouache on a palette and dip the bottom of the stipple brush in the gouache. Tap the brush on scrap paper first, then stipple it over the water spray area.
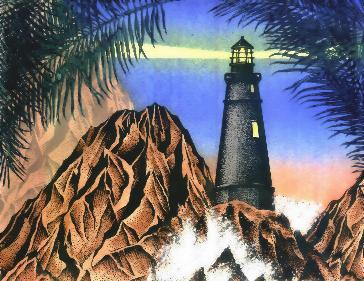
To finish the scene, Palm Frond Large 124F is stamped with dark green over the upper left and right corners.
"Sailor's Beacon" by Tyra Smith September 2000
Images: Stampscapes®: 095G Island Mountain Lg, 220G Lights,Rocks & Waves, 124F Palm Frond Lg, 099E Island Mountain.
Materials: King James Cast Cote 10 Point (White), Stipple brushes, paint brushes
Colour: HALOS dye ink pads, Printworks Dye Ink pads, Colorbox Pigment Ink pads, Gouache/white.